March 2017
Time to design: 2 hours
Time to print: 2 hours (your times may vary
Finishing: 1 hour
Original design:
NASA
Original designer: Michael Carbajal. NASA Headquarters
Try it yourself:
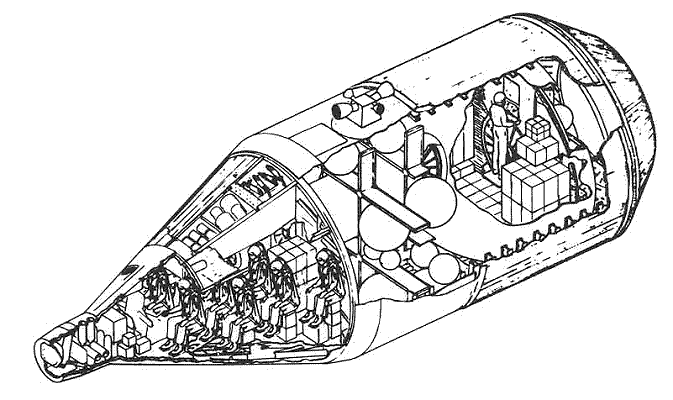
Mercury capsule slide
Greetings, and welcome to the new Slide of the Month from Channeling Whittlin Jim. This month is for a new generation of neckerchief slides designers, those who want to design and print them on a 3D printer.
Being a kid during the space race, I always dreamed of being an Astronaut and one of my hero's was John Glenn. This slide is a design of Freedom 7 I found on
NASA's 3D model resource page. The file was a 3ds file and what I needed was an stl file so I converted it using a free program called
Spin 3D Mesh Converter. Next I loaded the converted file into
Tinker Cad, a great free design program from Autodesk, and came up with the following model.
Now I could add the neckerchief ring to the model. Once I created the ring, it was a simple process to join the ring to the model
I then use the group function to make sure both parts became one model. Next I downloaded a stl file to import into another free program called
Cura which is what is used by the 3d printer I use called
Ultimaker 2.
Once loaded into Cura the model can be converted into gcode that the printer can print from. In my case this file was copied to a SD card so I could bring it to the printer location. I also added supports to help stabilize the model while printing. One the printing was done the model looked like this and the supports were easily removed.
I sanded where the supports connected to the model (around the heat shield and loop) and decided I liked the somewhat grayish look of the heat shield. Next was to paint the ring at the top and retro rockets silver with some model paint. I also painted the window to give it a operation glow with some paint pens. I also used a red model paint marker to paint the red ring between the heat shield and capsule. The final step was the marking on the capsule. For this I used white decal or water slide paper from
Blinggasm.com and Microsoft paint to create a set of decals on my inkjet printer.
Once the decals had been treated with an acrylic clear spray paint, I could cut them out and water slide them on to the capsule to finish the slide.
A quick disclaimer here, I do not own a 3D printer (though any company who wants to give me one will be gladly accepted) but what I do have is a great local public library.
The Berkshire Athenaeum
has 3D printers and classes to teach patrons how to use the printers. My thanks to Andrea Puglisi and everyone in the reference department for the patience and knowledge in helping me take a random thought and turn it into reality. Perhaps there is a local public library near you with the same kind or resources. For those who want to printing this design it is available on Tinkercad if you do a search of
Mercury capsule slide